How to Access TorrentGalaxy Without Proxies: The 2026 DNS & VPN Handbook
Last updated: February 7, 2026 | A technical guide to direct access using modern encryption standards
Let’s be honest about proxies: they’re a band-aid, not a solution.
Every TorrentGalaxy proxy you’ve bookmarked is one court order away from vanishing. Third-party proxies introduce latency, inject ads, and create a new intermediary who can log every torrent you search for. Some proxy operators even serve malware alongside the content you came for. You’re dodging one surveillance problem (your ISP) by handing your traffic to an unknown middleman — and hoping for the best.
That’s the whack-a-mole problem. A proxy goes down, you scramble for another. That one gets blocked, you find another. Meanwhile, your real IP address leaks, your DNS queries are readable in plaintext, and your ISP knows exactly which domains you’re requesting — even when the page itself is encrypted.
There’s a better approach. Instead of routing around the block through someone else’s server, you can fix the underlying weaknesses in your connection that allow the block to happen in the first place.
This guide walks you through the three layers of ISP site censorship — DNS hijacking, SNI filtering, and IP-level blocking — and the 2026 technical standards that defeat each one. No proxies needed.
The Anatomy of a Block: How Your ISP Actually Stops You
Before fixing the problem, you need to understand what’s happening under the hood. ISP-level site censorship — the kind that blocks TorrentGalaxy and similar torrent sites — relies on two specific weaknesses in how your browser connects to websites. Knowing these gives you the exact playbook to defeat them.
DNS Hijacking: Your ISP Is Lying to Your Browser
Every time you type torrentgalaxy.to into your browser, the first thing that happens is a DNS lookup. Your browser asks a DNS server — essentially a phonebook for the internet — “What is the IP address for torrentgalaxy.to?”
By default, that DNS server is run by your ISP. And here’s the problem: when a court order or government directive tells an ISP to block a site, the easiest method is DNS hijacking. Your ISP’s DNS server simply lies. Instead of returning TorrentGalaxy’s real IP address, it returns nothing, a block page, or a redirect.
This is also called DNS poisoning, and it’s the most common form of geo-blocking and regional filtering used against torrent sites worldwide. It’s cheap to implement, affects every device on your network, and most users never realize it’s happening.
The fix is straightforward: stop using your ISP’s DNS server. But simply switching to Google DNS (8.8.8.8) or Cloudflare (1.1.1.1) at the system level isn’t enough anymore. Traditional DNS queries travel in plaintext over port 53. Your ISP can still see them — and some ISPs now use transparent proxy technology to intercept and redirect DNS traffic even when you’ve configured a third-party resolver.
The real solution is DNS over HTTPS (DoH), which we’ll set up in Phase 1.
SNI Filtering: The Metadata Leak in Your Encrypted Connection
Here’s the part that surprises most people. Even when you’re visiting a site over HTTPS — with that reassuring padlock icon in your browser — your ISP can still see which website you’re connecting to.
Why? Because of a field called Server Name Indication (SNI).
When your browser initiates a TLS 1.3 handshake with a web server, it needs to tell the server which site it’s requesting. This is necessary because many websites share the same IP address (especially those behind CDNs like Cloudflare). The problem is that the SNI field is sent in plaintext as part of the initial “Client Hello” message — before encryption kicks in.
So even though your ISP can’t read the content of your HTTPS connection, it can read the SNI and see that you’re connecting to torrentgalaxy.to. That’s all it needs to drop the connection.
This is SNI filtering, and it’s the more sophisticated form of site censorship used by ISPs in the UK, Australia, India, South Korea, and increasingly across the EU. DNS-level blocks can be bypassed by switching DNS providers. SNI filtering cannot — unless you encrypt the Client Hello itself.
That’s what Encrypted Client Hello (ECH) does, and we’ll enable it in Phase 2.
Phase 1: Fixing the “Phonebook” — DNS over HTTPS (DoH)
DNS over HTTPS moves your DNS queries from plaintext (readable by your ISP, your router, and any network intermediary) into an encrypted HTTPS tunnel over port 443 — the same port used by every regular website. Your ISP can’t distinguish DoH traffic from normal web browsing.
This single change defeats DNS hijacking and DNS poisoning entirely. Your ISP’s transparent proxy can’t intercept what it can’t read.
Browser-Level DoH Setup (Fastest Method)
Firefox — Maximum Protection Mode
Firefox has the most mature DoH implementation of any browser. Here’s how to enable it at the highest level:
- Open Firefox and go to Settings → Privacy & Security
- Scroll down to DNS over HTTPS
- Set it to Max Protection (this forces all DNS queries through the encrypted resolver and blocks fallback to your ISP’s DNS)
- Choose a provider — Cloudflare (1.1.1.1) is the default and the fastest. NextDNS is another good option that offers customizable filtering.
With Max Protection enabled, Firefox will refuse to fall back to your ISP’s plaintext DNS, even if the DoH resolver is temporarily unavailable. This is the behavior you want.
Chrome / Brave / Edge — Secure DNS
Chromium-based browsers call this feature “Secure DNS”:
- Go to Settings → Privacy and Security → Security
- Toggle on Use secure DNS
- Select Cloudflare (1.1.1.1) or Google (dns.google) from the dropdown
- Choose “With” your selected provider (this forces DoH rather than falling back to your system DNS)
Note: Chrome will not perform an ECH handshake if a traditional HTTP/HTTPS proxy is configured. If you’re using a SOCKS5 proxy or VPN at the system level, this doesn’t apply — but it’s worth knowing.
OS-Level DoH Setup (Covers All Applications)
Browser-level DoH only protects DNS queries made by that specific browser. Your torrent client, other browsers, and system processes still use your default DNS. For complete protection, configure DoH at the operating system level.
Windows 11
- Open Settings → Network & Internet → Wi-Fi (or Ethernet) → Hardware Properties
- Click Edit next to DNS server assignment
- Switch from Automatic to Manual
- Enable IPv4 and enter:
- Preferred DNS:
1.1.1.1 - DNS over HTTPS: On (automatic template)
- Alternate DNS:
1.0.0.1 - DNS over HTTPS: On (automatic template)
- Preferred DNS:
- Enable IPv6 and enter:
- Preferred DNS:
2606:4700:4700::1111 - Alternate DNS:
2606:4700:4700::1001 - DNS over HTTPS: On for both
- Preferred DNS:
- Click Save
Windows 11 natively supports DoH for Cloudflare (1.1.1.1), Google (8.8.8.8), and Quad9 (9.9.9.9) without additional software.
macOS (Sonoma / Sequoia)
macOS doesn’t have a built-in DoH toggle in System Settings. You have two options:
Option A — Use a DNS profile: Download a DoH configuration profile from Cloudflare (available at one.one.one.one) or Quad9. Double-click to install it, then activate it in System Settings → Privacy & Security → Profiles.
Option B — Firefox as your primary browser: Configure DoH in Firefox as described above. This is the simplest approach and also enables ECH (Phase 2) in the same step.
Flush Your DNS Cache After Switching
After changing DNS settings, flush the old cached records so your system starts using the new resolver immediately:
Windows (Command Prompt as Administrator):
ipconfig /flushdnsmacOS (Terminal):
sudo dscacheutil -flushcache; sudo killall -HUP mDNSResponderAt this point, your DNS queries are encrypted. Your ISP can no longer lie to your browser about where TorrentGalaxy lives. If the block was DNS-based — and most are — you can now access torrentgalaxy.to directly.
But if your ISP uses SNI filtering (common in the UK, Australia, India, and parts of Europe), you’ll need Phase 2.
Phase 2: Closing the “SNI Gap” — Encrypted Client Hello (ECH)
Encrypted Client Hello is the 2026 standard that finally closes the last major metadata leak in HTTPS. It encrypts the SNI field in the TLS 1.3 handshake, so your ISP can no longer see which specific website you’re connecting to during the initial “Client Hello” exchange.
Here’s how it works: ECH splits the Client Hello into two parts. The “outer” hello contains only generic information — your browser is connecting to a Cloudflare server, for example. The “inner” hello, which contains the actual domain name (torrentgalaxy.to), is encrypted with a public key that the server advertises through its DNS HTTPS records. Your ISP sees a connection to Cloudflare’s infrastructure. It cannot see the specific hostname inside.
Current ECH Support (February 2026)
ECH adoption has accelerated rapidly:
- Cloudflare enabled ECH by default for all customers (including free plans) in late 2023. This means any website behind Cloudflare — which includes roughly 70% of the web — can benefit from ECH automatically.
- Firefox and Chrome both ship with ECH support enabled by default. Approximately 59% of browsers in active use now support ECH out of the box.
- Safari has indicated support for ECH but has not fully implemented it yet.
For ECH to work, three conditions must be met:
- Your browser supports ECH (Firefox, Chrome, Edge, Brave all do)
- The website is hosted behind a CDN that supports ECH (Cloudflare is the main one)
- Your DNS resolver can fetch HTTPS resource records containing the ECH configuration — this is why DoH must be enabled first (Phase 1)
Enabling ECH in Firefox
Firefox has the most reliable ECH implementation:
- Type
about:configin the address bar and press Enter - Accept the warning
- Search for and verify these settings:
network.dns.echconfig.enabled→ truenetwork.dns.use_https_rr_as_altsvc→ true
In recent Firefox versions, both settings are enabled by default. But verify them — especially if you’re on a managed device or enterprise network where administrators may have disabled ECH via the DisableEncryptedClientHello enterprise policy.
Important note for macOS users: Firefox on macOS currently requires DoH to be enabled for ECH to function. A bug with the macOS DNS integration prevents ECH from working through the OS resolver alone. Enabling DoH in Firefox (Phase 1) resolves this.
Enabling ECH in Chrome / Brave / Edge
Chromium-based browsers also support ECH, but you may need to verify it’s active:
- Navigate to
chrome://flags(orbrave://flags,edge://flags) - Search for
encrypted-client-hello - Set it to Enabled
- Also enable
use-dns-https-svcb-alpn→ Enabled - Restart the browser
Verify ECH Is Working
Visit https://tls-ech.dev or https://defo.ie/ech-check.php to confirm your browser is performing ECH handshakes. If the test shows ECH is active, your ISP can no longer see the specific domain name in your TLS handshake.
With DoH (Phase 1) and ECH (Phase 2) working together, you’ve eliminated both DNS-based and SNI-based censorship. Your ISP sees encrypted DNS queries going to Cloudflare’s resolver and HTTPS connections going to Cloudflare’s CDN infrastructure — but it cannot determine that you’re visiting TorrentGalaxy specifically.
Phase 3: The “Nuclear” Fallback — Official Onion Access via Tor
Sometimes, DoH and ECH aren’t enough. Some ISPs and national firewalls use deep packet inspection (DPI) or IP-level blocking that goes beyond DNS and SNI. Russia’s TSPU system, for example, directly censors connections containing an ECH extension. China and Iran effectively prevent ECH by blocking encrypted DNS resolvers entirely.
For users in high-censorship regions — or anyone who wants zero tracing and zero censorship by default — the Tor network is the nuclear option.
Why Tor?
Tor routes your traffic through a minimum of three encrypted relays before it reaches its destination. Your ISP sees a connection to a Tor entry node. The entry node knows your IP but not your destination. The exit node knows the destination but not your IP. No single point in the chain has the complete picture.
When combined with a .onion address, even the exit node is removed from the equation — the connection stays entirely within the Tor network. This is the strongest privacy guarantee available for accessing any website.
TorrentGalaxy’s Official .onion Address
galaxy3yrfbwlwo72q3v2wlyjinqr2vejgpkxb22ll5pcpuaxlnqjiid.onionThere is also a second official Tor address:
galaxy3k5w5zd77zz2fzrrplj4hkcn6dbauy3nyrxjnhaszgc3xyhrqd.onionCopy either address and paste it into the Tor Browser (do not use a regular browser — it won’t resolve .onion addresses).
When to Use It
Tor is the right choice when:
- You’re in a high-censorship country (UK, Australia, India, Russia, China, Iran) where DNS and SNI-level fixes are insufficient
- Multiple proxies and mirrors are simultaneously down — the
.onionaddress is independent of the clearnet domain system entirely - You want zero metadata leakage — no DNS queries, no SNI fields, no IP exposure
- Your ISP uses deep packet inspection or QUIC protocol analysis to detect and block VPN or ECH connections
A Note on Speed
Tor is slower than direct connections. Traffic bounces through multiple relays worldwide, adding latency. This is acceptable for browsing TorrentGalaxy and grabbing magnet links, but you should not torrent directly over Tor. It overloads the volunteer relay network and compromises both your speed and the privacy of other Tor users.
The correct workflow: use Tor to access TorrentGalaxy, find your magnet links, then download the actual torrents through a VPN-protected torrent client (Phase 4).
Phase 4: Optimization with VPN Split-Tunneling
A VPN encrypts all your traffic and routes it through a server in another location. This defeats ISP monitoring, prevents IP exposure in torrent swarms, and handles any residual IP-level blocking. But routing everything through a VPN has trade-offs: streaming services may block your connection, banking sites might flag unusual locations, and your overall bandwidth takes a hit.
Split-tunneling solves this. It lets you route only specific applications — your browser and torrent client — through the VPN tunnel while everything else uses your normal connection.
The Speed vs. Safety Calculation
Here’s how to think about it:
- Browser (accessing TorrentGalaxy): Route through VPN. This hides the connection from your ISP and adds IP masking on top of DoH + ECH.
- qBittorrent / torrent client: Route through VPN. This is non-negotiable. Your IP address is visible to every peer in the torrent swarm. Without VPN protection, your real IPv4 or IPv6 address is exposed.
- Streaming, gaming, banking: Route through your regular connection. These benefit from lower latency, aren’t subject to ISP torrent blocks, and some actively block VPN IP ranges.
Split-Tunneling Setup (NordVPN Example)
Most premium VPN providers support split-tunneling. Here’s the general approach using NordVPN on Windows:
- Open NordVPN and go to Settings → Split Tunneling
- Toggle Split Tunneling on
- Set the type to “Enable VPN for selected apps”
- Click Add apps and select:
- Your browser (Firefox, Chrome, etc.)
- Your torrent client (qBittorrent, etc.)
- Click Add selected and close settings
- Connect to a P2P-optimized server
Now only your browser and torrent client route through the encrypted VPN tunnel. Everything else uses your regular connection at full speed.
Binding qBittorrent to the VPN Network Interface (Kill-Switch at the App Level)
This is the power-user move that prevents IP leaks even if the VPN connection drops unexpectedly. Instead of relying solely on the VPN’s kill switch, you bind qBittorrent directly to the VPN’s network interface card (NIC). If the VPN disconnects, qBittorrent has no network interface to use — it simply stops all traffic instead of falling back to your real connection.
In qBittorrent:
- Go to Tools → Preferences → Advanced
- Under Network interface, select your VPN adapter from the dropdown
- For NordVPN / ProtonVPN / most providers, this will be labeled something like
NordLynx,ProtonVPN TUN, orwg0(for WireGuard-based connections) - For OpenVPN-based connections, look for
TAP-Windows Adapterortun0
- For NordVPN / ProtonVPN / most providers, this will be labeled something like
- Click Apply and restart qBittorrent
Verify it’s working:
- Connect your VPN and start a torrent
- Visit ipleak.net in your browser
- Use the “Torrent Address detection” feature — add the magnet link to qBittorrent
- Check that the IP shown matches your VPN server’s IP, not your real IP
- Disconnect the VPN and confirm qBittorrent stops all transfers
Protocol Optimization
For torrenting specifically, WireGuard is the optimal VPN protocol. It offers the best balance of speed and AES-256-grade encryption with significantly lower latency than OpenVPN. Most modern VPN apps default to WireGuard (NordVPN calls their implementation “NordLynx”; ProtonVPN uses standard WireGuard).
If WireGuard isn’t available, IKEv2 is the next best option for speed. OpenVPN provides maximum compatibility but introduces more overhead — use it only if the other protocols are blocked.
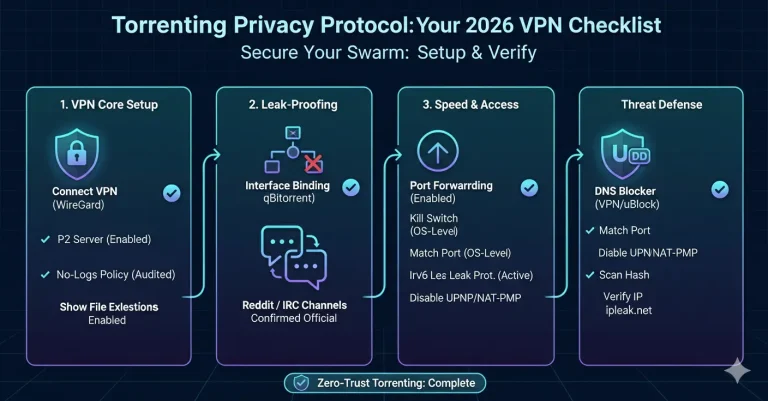
Conclusion: The “3-Layer Shield” Checklist
You don’t need to chase proxies that die every week. Here’s the stack that gives you reliable, censorship-resistant access to TorrentGalaxy — and any other blocked site — using 2026 technical standards:
Layer 1: Encrypted DNS (DoH)
- Enable DNS over HTTPS in Firefox (Max Protection) or Chrome (Secure DNS)
- Set Cloudflare (
1.1.1.1) or Quad9 (9.9.9.9) as your resolver - Configure DoH at the OS level (Windows 11 Settings / macOS DNS profile) for system-wide protection
- Flush your DNS cache after switching
What this defeats: DNS hijacking, DNS poisoning, ISP DNS redirection, transparent proxy interception
Layer 2: Encrypted Client Hello (ECH)
- Verify
network.dns.echconfig.enabled= true in Firefox’sabout:config - Or enable
#encrypted-client-helloin Chrome/Brave/Edge flags - Test at tls-ech.dev to confirm ECH is active
- Ensure DoH is working (ECH depends on HTTPS DNS records)
What this defeats: SNI filtering, TLS handshake inspection, hostname-based blocking on port 443
Layer 3: VPN with Split-Tunneling
- Connect to a P2P-optimized VPN server (ProtonVPN recommended)
- Enable split-tunneling — route only your browser and qBittorrent through the tunnel
- Bind qBittorrent to the VPN’s network interface (NIC) as an app-level kill switch
- Enable the VPN’s system-wide kill switch as a secondary safeguard
- Use WireGuard protocol for optimal speed
What this defeats: IP-level blocking, torrent swarm IP exposure, ISP traffic analysis and throttling
Nuclear Fallback: Tor
- Keep the Tor Browser installed
- Bookmark the official
.onionaddress:galaxy3yrfbwlwo72q3v2wlyjinqr2vejgpkxb22ll5pcpuaxlnqjiid.onion - Use Tor for browsing and magnet links only — route actual torrent downloads through your VPN
What this defeats: Deep packet inspection, QUIC protocol analysis, IP-level blocking, all forms of ISP censorship
Quick Reference: What Blocks What, and What Fixes It
| ISP Censorship Method | What It Targets | Your Fix |
|---|---|---|
| DNS hijacking / poisoning | Domain-to-IP resolution | DNS over HTTPS (DoH) via Cloudflare 1.1.1.1 |
| SNI filtering | Hostname in TLS handshake | Encrypted Client Hello (ECH) |
| IP-level blocking | Server IP address | VPN (changes your exit IP) or Tor |
| Deep packet inspection (DPI) | Traffic pattern analysis on port 443 | Tor with .onion address (stays inside the network) |
| Transparent proxy interception | DNS queries on port 53 | DoH routes DNS over port 443 as standard HTTPS |
| Regional filtering / geo-blocking | IP geolocation | VPN server in an unrestricted country |
Stop chasing mirrors. Fix the connection.
Your ISP has two tools: DNS lies and SNI snooping. DoH kills the first. ECH kills the second. A VPN covers everything else. And Tor exists for when all else fails.
Bookmark this page. The protocols won’t change — only the sites your ISP tries to block next.